
Hello. Hello and Merry Christmas to you all! Norma here with you today for:
Before I get started, I'd like to invite you to check out Cathi's wonderful Tutorial Tue post: Stamped & Image Transferred Soaps.

Okay so my theme today is ornaments and I've made two to share with you.

The holidays are a fun time to make new ornaments. You could give them away as gifts or get together each year and create new ones with your family. So with that in mind, here are a couple of ideas to get you started. One is very simple and the other is very layered. I tried to use the same stamp sets for both ornaments to show you how versatile they are.

This was the first ornament I made and I used a TON of stamps to add texture to my background.

I started out with a sheet from a shaped chipboard mini album and applied a layer of gesso. (tidbit: I buy a lot of mini albums but never use them for their intended use. I like creating ornaments, wall hangings and altered art with them instead.)

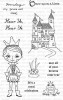
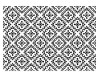
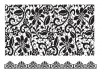
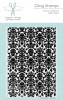
I created the first layer of the background using the following stamps: Damask Cling Stamp, Lace With Border Clear Stamp & Tile Pattern Clear Stamp. I stamped each one in a patchwork pattern and then used the lace boarder to define each section. After that, I added another layer using these stamps: castle from the Prince Clear Stamp set, flying fairy from Fairy Friends Stamp set and the Text Cling Stamp set.

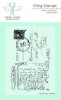
Next I stamped a strip of cardstock with the Postcard Cling Stamp and then ran it through my Cuttlebug to cut the mini snowflake rosettes.

Finally I stamped Psalms 46:10 from the Scriptures stamp set and cut into strips. I layered all of the embellishments, inked the edges and added a second hole to create the ribbon hanger.

Now for a much simpler ornament that is just as beautiful.

I started out with a paper mache ornament and gesso'd it just like before. Then I applied a coat of paint and used the Postcard stamp all over the background.

After that, I used the same lace ribbon border on the perimeter of the ornament. I simply curved the clear stamp to fit my ornament and stamped it all the way around. Next I stamped the prince onto cardstock, colored, fussy cut and glued him on. I stamped Proverbs 15:13 from the Scriptures stamp set and added ribbon around the edges meeting at the top to create a bow.

When using stamps, the possibilities are endless! Thanks so much for joining me today and don't forget to pick up the Dec Nesting Components kit!!

Have a wonderful day!!

These are beautiful, Norma! I love the Prince ornament. :)
ReplyDeleteBoth of these are gorgeous, I love the way you combine so many stamps!! And thanks for the mention of my tute :D
ReplyDeleteBeautiful ornaments :)
ReplyDeleteGorgeous, I love the bird shaped one!
ReplyDeleteBeautiful, Norma. I love them both for different reasons…the sentiments are just lovely! Thanks for sharing your instructions!
ReplyDeleteStunning handmade ornaments Norma!! Your work is always so inspiring!! Thanks for sharing!!
ReplyDelete